Porting a C# NES emulator to Rust
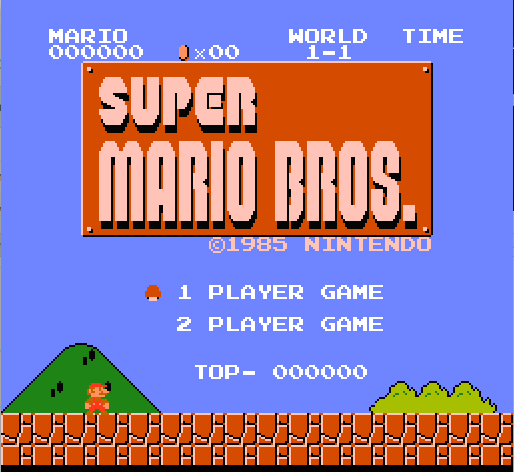
November 20, 2015 -Many years ago, I created a simple NES emulator in C# using SDL and Mono. For fun, I wanted to see what it would be like to port that emulator to Rust. A couple weeks later, after poking on it on and off between packing for a move, I was able to get it working.
What I did
Loading a binary file
Loading the types of files commonly used in emulators requires us to work with binary files. To do so, we need a way of loading the raw data both as just plain bytes and also as numbers. Rust, by default, comes with a fairly slim API for dealing with binary data. No matter, Rust is also very flexible and allows you to build on additional parts to the API to suit your needs.
I started there, and built out a few functions that would let me read in the numbers from the file both using big-endian and little-endian.
pub trait BitReader {
    fn read_u32_be(&mut self) -> Result<u32, io::Error>;
    fn read_u32_le(&mut self) -> Result<u32, io::Error>;
}
impl BitReader for File {
    fn read_u32_be(&mut self) -> Result<u32, io::Error> {
        let mut buffer = [0; 4];

        try!(self.read(&mut buffer));

        Ok(buffer[3] as u32 + ((buffer[2] as u32) << 8) +
            ((buffer[1] as u32) << 16) + ((buffer[0] as u32) << 24))
    }
    fn read_u32_le(&mut self) -> Result<u32, io::Error> {
        let mut buffer = [0; 4];

        try!(self.read(&mut buffer));

        Ok(buffer[0] as u32 + ((buffer[1] as u32) << 8) +
            ((buffer[2] as u32) << 16) + ((buffer[3] as u32) << 24))
    }
}
Once I had the trait, I could import it where I wanted to use these extra read capabilities on File.
With these extra methods in place, I could plow through the binary file loading with a mix of the File read functionality and the BitReader trait.
I did notice I used the odd concoction buffer.iter().cloned().collect() to convert from an array to a Vec of the same contained type:
for _ in 0..(num_prg_pages*4) {
    let mut buffer = [0; 4096];
    try!(f.read(&mut buffer));
    prg_rom.push(buffer.iter().cloned().collect());
}
There may be a more Rust-native way of doing it. Personally, I think it'd be nice to be able to read directly into a Vec, so you could elide that step.
Side-by-side porting
One of the first things I did after I had file loading in place was to start porting over the CPU emulation. Because I wanted the code to be fairy clean, I opted to not do a literal port. Instead, I opened two separate editor windows: one for the original C# source, and one for the new Rust source. Tedious, but I hoped that a port focused on what would fit better with Rust would be less error-prone.
There's another reason not to do copy/pasting of code when porting: too many little things needed to be changed to the Rust style. For example, Rust-friendly names often differ from the C# equivalent (eg the ReadChrRom method would need to be read_chr_rom to match Rust naming conventions). Like-wise, little things that help readability in Rust, like the "no parens around if guards" means that copy/pasted code would need to be touched up. All told, a minor frustration, but it gave ample time to make the code look a bit cleaner in the transfer so likely a net win.
Feeling more comfortable with Rust's use of expressions, I could write code in a more dense way. For example, here is some code from the ROR or Rotate Right opcode in C#:
if ((valueholder & 0x1) == 0x1)
	bitholder = 1;
else
	bitholder = 0;

valueholder = (byte)(valueholder >> 1);

if (carry_flag == 1)
	valueholder = (byte)(valueholder | 0x80);

carry_flag = bitholder;

if ((valueholder & 0xff) == 0x0)
	zero_flag = 1;
else
	zero_flag = 0;

if ((valueholder & 0x80) == 0x80)
	sign_flag = 1;
else
	sign_flag = 0;
and here's what it became in Rust:
let bit = (value & 0x1) == 0x1;
value = (value >> 1) & 0x7f;
value += if self.carry {0x80} else {0};
self.carry = bit;
self.zero = value == 0;
self.sign = (value & 0x80) == 0x80;
Some of these changes could have been done in the original C#, but I didn't notice them at the time. Still, I think the result Rust is still pretty readable, even though it's more compact.
While we're talking about bit rotation, one of the annoyances I experienced working on bit manipulation code is that Rust is more vigilant about overflow checking. In hindsight, this is actually a good thing, but coming from languages like C# and JavaScript that are less vigilant, it was a bit of a headache to adjust to. I ended up doing some of my own bit masks so I didn't have to worry about it, but I noticed that they've added a number of "wrapping" operations in Rust 1.4 that allow you to work around the overflow checks.
Hitting the first ownership error
A few days into the port, I hit my first ownership error. Here's a quick rundown of the NES, so you can see why that might be so:
- CPU: The CPU :)
- PPU: The NES's graphics unit
- MMU: Not technically not called the MMU, but let's call it an MMU for our purposes
- Cart: The program to run
Now that we have the parts, here's how they talk to each other:
- CPU asks the MMU for an instruction, and the CPU may also write back to memory
- PPU reads memory from the Cart, and can also transfer memory from MMU to graphics memory
- MMU needs to read information from the Cart and can also read and write from the PPU
All the subsystems, in essence, need to be able to talk to each other at some level. Which is exactly how I set up the C# project. Singleton objects with references to each other. When I ported over to TypeScript a few years ago, similar idea.
But in Rust, ownership needs to be clear. If you call a method, you can't also pass something you own to that method, like so:
foo.x.y(foo.x.z)
The net result is that I went back to the drawing board and thought long and hard about what was actually necessary for each component. After a couple of refactorings, I think I landed on a solution that's both cleaner and clearer. Every object has one owner, and I don't do any ref cells or ref counting.
Deriving debug
There are a few tricks that I loved in Haskell that I wished other languages would pick up. One of them is the ability to automatically be able to print out objects for you.
In Rust, you can do this using the 'derive' command:
#[derive(Debug)]
struct Foo {
  x: u32
}
//...

let foo = Foo { x: 10 }
println!("{:?}", foo);
By deriving Debug, you have the ability to output a debug format of that structure, which is output using {:?}.
This is very handy to help bootstrap a project, when you quickly want to look at the contents of what is working so far. After a while, I found I ended up removing these helpers and putting in my own, customized implementations.
SDL
Using SDL was dead simple. I used the SDL2 Rust bindings. After a few tries to follow the directions to install SDL2 carefully, I had it working in both Windows and OS X. After it's installed, the bindings "just work".
I'd never used SDL2 before, but after looking through the examples directory, especially the texture sample, I was good to go.
What I didn't do
Chase crashing bugs
After wrestling a few ownership errors, I largely spent my time on correctness. I ended up having a few hard-to-find issues where I flipped the boolean logic on a check or discovering I forgot to implement a piece of the machine that was required. After many hours pouring over the code side by side, or looking at the output log, I finally managed to get the outputs similar.
Just as in the C# and JavaScript versions of the emulator, I didn't worry about any crashes. A few times I had an arithmetic overflow or error accessing a vector out of bounds, but those were easy to fix.
Optimize
After I got the emulator working, I let it rip. The result was something unplayably fast. Not bad for a first try.
In hindsight, this isn't too surprising. The CPU gets to work directly with the MMU. Ditto with the MMU and the PPU. The systems can call functions in each other without any abstraction, VM, or GC. By default, the core structs sit on the stack.
Using Rust had nudged me into doing what would have made sense for a decent C-based approach, without the risks. Of course, it's not like Rust prevents you from adding in a hefty abstraction layer, but the defaults seem to push you in the right direction.
Unit test
For this to feel like a real Rust project, though, it needs some tests. I asked Patrick Walton, the author of probably the first NES emulator for Rust, about testing emulators with Rust unit tests, but he didn't use them for his project either.
Still, I suspect there's a way of creating fairly testable, and still performant, parts of the emulator. For example, opcodes could each have their own unit test if there was a way, possibly with traits, to decouple them from working so closely with the MMU.
Add audio support
In Patrick's video about his emulator, he mentions that he took it on to show that Rust can do real-time processing. For an emulator, that means that the audio is emulated properly and sounds correct. I haven't added any audio support, but it would be a fun project at some point.
Precisely emulate the machine
The never-ending rabbit hole for any emulation project is to see just how precisely you can emulate the hardware. There's plenty of work here.
What I've learned
I'm getting a little more comfortable with Rust. Thinking through an ownership refactoring can still take a while, but it's starting to feel like the hurdle you take on so that you can worry less about safety and performance. I still have a ways to go before it becomes second nature.
Cargo shines again, and the SDL bindings were easy to put in place and worked as expected. No complaints there.
Feels like I'm still scratching the surface. There are likely some slick spots to use traits and macros to cut down on the redundancy and coupling, repectively. But I'm happy with the progress.